After installing Windows XP, now we continue to install Ubuntu in the Virtualbox.
Ok, lets get start.
1. Click "New" from the virtualbox main window.

2. Name your OS and Choose its Type.

3. Adjust the memory.

4. Like the previous, we will create a new disk for this system.

5. Do the step like when we create the disk for windows system before.


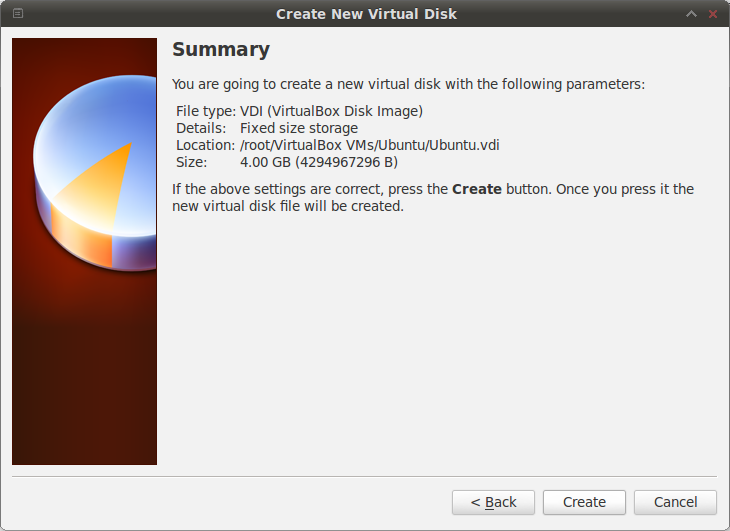
6. System summary. Click "Create"

7. Ok, new disk for ubuntu has been created. Lets install the system inside. Hit "Start".

8. First run wizard window will appear again.
9. Locate the ISO of the Ubuntu that we want to install. Here i use Ubuntu 10.04 Desktop i386.


10. First Run Wizard's Sumarry.

11. Installation begin.

12. First window of the installation. Choose "Install Ubuntu 10.04 LTS".

13. Set the time zone.

14. Set the keyboard layout.

15. Create the partition. Choose "Specify Partition Manually".
16. Click "New Partition Table" and answer Yes to the question.

17. Click the Free Space and then click "Add"
18. Use the configuration as follow.

19. We have created the main system partiton. Lets use the rest as the swap partition.

20. When you're ready. Click Forward to continue the installation.

21. Enter your name and the root password.

22. Confirmation windows will appear. Click "Install".

23. Wait until the installation finished.


24. Ok. After the installation complete we must restart the system.

25. Login with the account you've created before.

26. There you are..
Fully functional Ubuntu 10.04 in your Backtrack's VirtualBox.

